
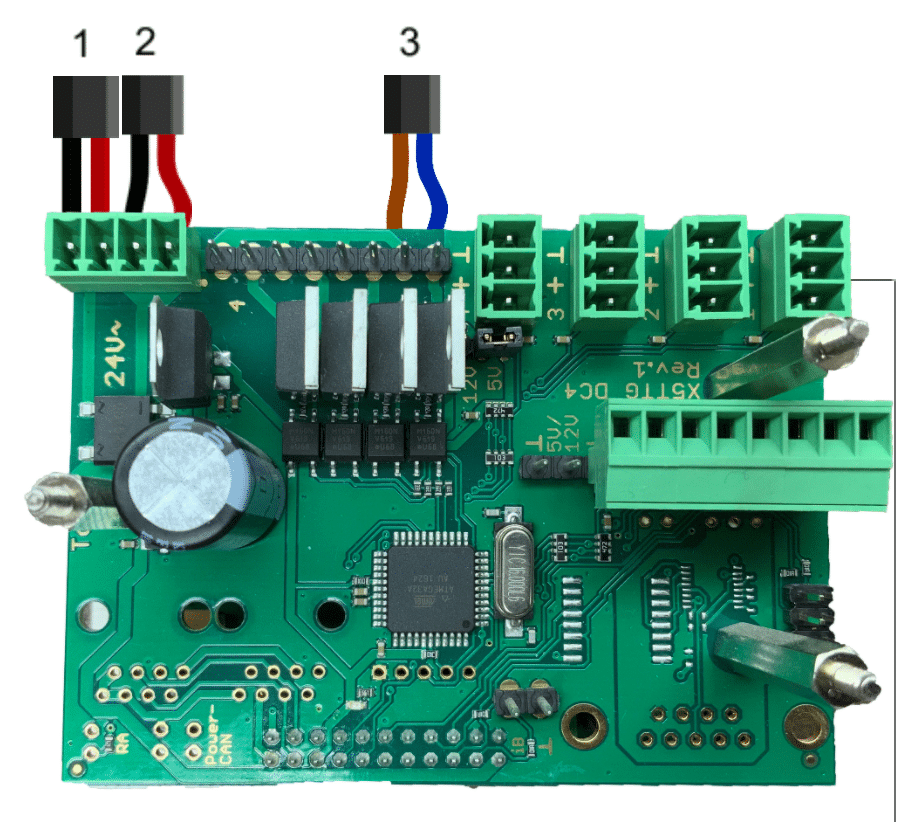
1.Power Supply In: This is the power coming in from the transformer. Right or left connection order does not matter.
2. Power Supply Out: This is used to power additional screens. You can only daisy chain if the total number of valves on being powered is 4 or less.
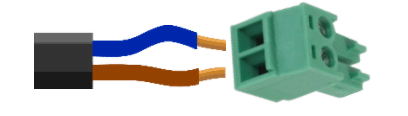
3. Fluid Control Valve: Each valve will be a pair of blue and brown wires. Valves are numbered from right to left just like flowmeters (diagram shows connection in valve 1 used). The wires can go in any order, as long as you keep a consistent pattern all the way through for every valve.
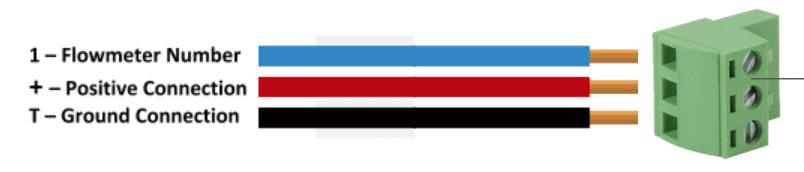
4. Flowmeter: The diagram below illustrates the proper connections for the flowmeter, you will match the wires from the flowmeter to the labels on the flowmeter section on the board.
Additional Connections
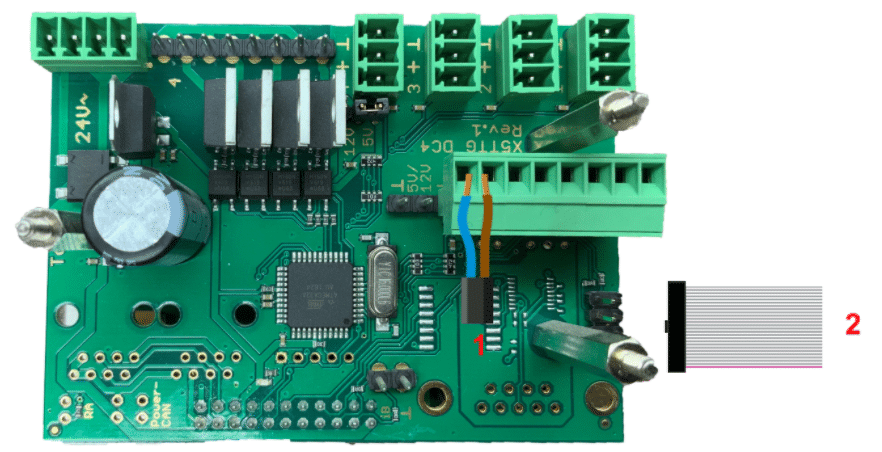
1. Smart Fob: Like all other connections on the board, Smart fob connections are numbered from right to left (diagram shows line 4 being used). Connect the blue and brown cables like shown above.
2. Card Reader Ribbon Cable: The card reader ribbon cable will always have a colored line, ensure this colored line is connected to the left of all other connections.
 For your safety always ensure the power source has been disconnected when making modification to the wiring of the TTG board.