
How to write an image to a new SD card using HDD Raw Copy
- Download Software here: https://hddguru.com/software/HDD-Raw-Copy-Tool/
- The first screen is where the SOURCE is selected. In the case of writing a new SD card, the SOURCE is going to be the TTG image file. To select the TTG image file, double-click the “File” line; where it says “Double-click to open file”.
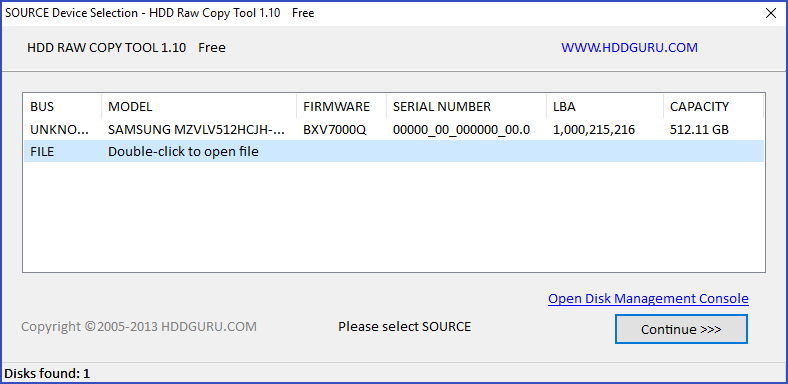
- Double-clicking this will open the “open” dialogue. From there, navigate and select the TTG image file.
- After the image is selected it should appear in the “file section”. After the file is there press continue.
- The next screen is the “TARGET” screen. This is where you select where the image file is going to be written.
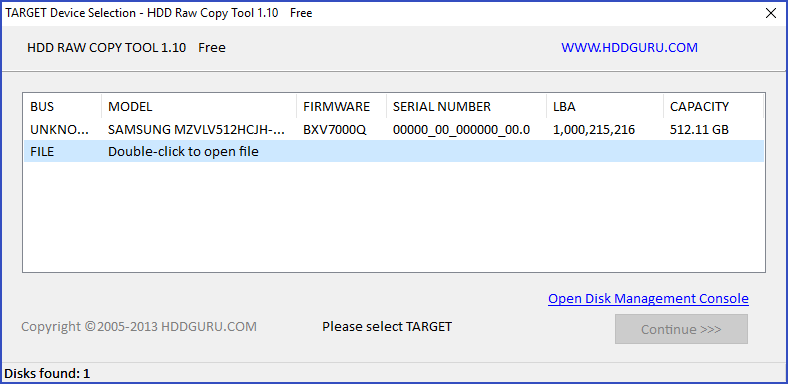
The TARGET, in this case, is going to be the new SD card. It will likely be listed as “Generic mass storage device”. If you are confused about which device to use, you can reference the device based on the number in the “CAPACITY” column. An SD card should only be 4-16 gigs, whereas a system hard drive will be significantly larger.
Once the SD card is selected as the “TARGET”, press the continue button. A message will appear asking you to confirm that you want to write the file to target. From this point, the software will start writing the image file to the SD card.
On average, the copying process takes about 20 minutes. This time will vary based on the specs of the machine doing the writing.
Once the image is written to the SD card, close the software and remove the SD card. That SD card can then be placed into the screen.