
Calibration ensures that the ounces displayed on the tap screen match the actual ounces poured from the tap.
Keeping your system properly calibrated guarantees accurate pour tracking, consistent reporting, and customer trust.
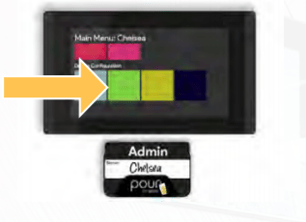
Step 1: Access the Calibration Menu
-
Place your Admin Card on the tap screen you wish to calibrate.
-
Tap the Configure Valves button (green).
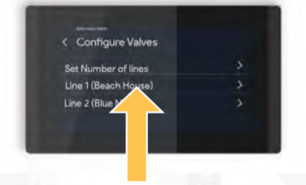
Step 2: Select the Tap Line
-
Tap the line number you want to calibrate.
-
The calibration settings for that specific line will appear.
-
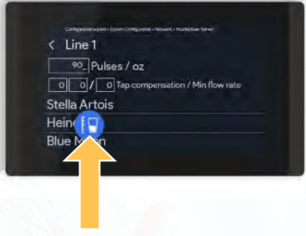
Locate the field labeled Pulses per Ounce (Pulses/oz).
Step 3: Review and Adjust Pulses per Ounce
The Pulses/oz value tells the system how many sensor pulses equal one ounce of liquid poured.
-
Default Value:
90— recommended for most standard installations.
You can manually adjust this value up or down based on the difference between what’s poured and what’s displayed.
Adjustment Guide
-
If more beer is pouring than the screen shows → Lower the Pulses/oz value.
-
If less beer is pouring than the screen shows → Raise the Pulses/oz value.
Step 4: Calculate the Correct Pulses/oz Value
Use this simple formula to find your accurate calibration number:
Pulses Generated ÷ Ounces Poured = Pulses per Ounce
Example
-
Tap the Pulses/oz field, then press the blue measuring cup icon to pour a few ounces into a measuring cup.
-
The system will display how many pulses were generated.
-
Divide that pulse count by the number of ounces poured to calculate the correct value.
-
Enter your new Pulses/oz value into the field.
It’s best to pour at least 4–6 ounces for a more accurate calibration result.
Step 5: Save the Calibration
-
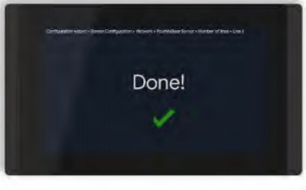
Tap the product name assigned to that line to save your calibration.
-
A confirmation screen will display “Done” once the calibration is saved successfully.
If the confirmation does not appear, repeat the process to ensure the calibration is stored.
Step 6: Verify Your Calibration
-
Pour a few ounces of beer into your measuring cup.
-
Compare the volume displayed on the screen to the actual amount poured.
-
If they match — your line is calibrated correctly!
-
If not, repeat the calibration and adjust the Pulses/oz value again.
For best results, calibrate each line after major hardware maintenance, cleaning, or flowmeter replacement.