Clover POS Installation Guide
Send the client this document to guide them through the process of creating their API Token and collecting the Merchant ID and optional tax rate: Get Clover API Token & Merchant ID Guide
NOTE: Only the Clover POS platform that allows for customer credit card pre-auth workflow will work with our integration.
After they provide the information from the guide it is helpful to have them login to their Clover account on the PMB server in case you need access to their account to confirm inventory sync or verify API Token.
Useful video showing high level terminal workflow: Clover Terminal workflow video.
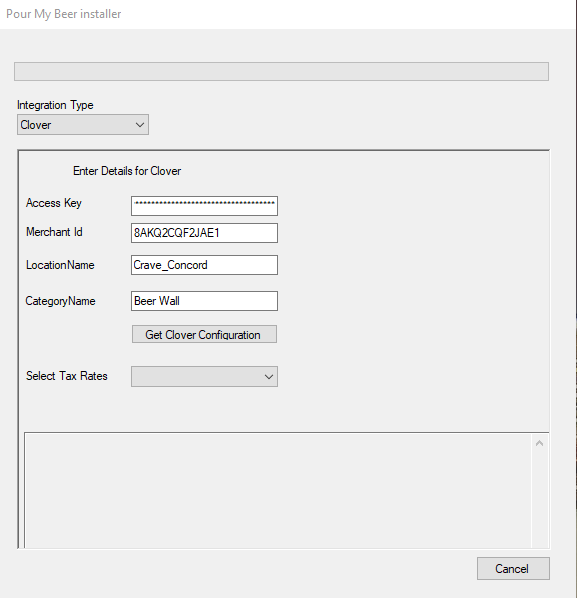
PMB Magic Installer Screen
When installing PMB Magic select the “Clover” option from the Integration Type drop down. Fill in the Access Key (aka API Token) & Merchant ID. Location Name should be a descriptive name to identify the location and will display in the PMB Magic Version Management System. Category Name is a free form field used to create a new or map to an existing menu category in Clover. All products will automatically be added to that category. At this point select the Get Clover Configuration button which will load the available tax rates.
Once loading is complete, pick a tax rate from the Select Tax Rate drop down. This is optional if the client requires that beer wall products are assigned a specific tax rate. The tax rate must be added to their Clover account prior to install to appear in the drop down list. (see client guide linked above for tax rate instructions). If no specific tax rate is needed then select None and continue the installation.
Get Client Merchant ID & API Token
Collect client’s Clover Merchant ID & API Token prior to PMB Magic v2 install.
Example merchant ID and API Token:
Clover Merchant ID: T3YHHU773EP1
Clover API Token: d73a6d6f-84h4-9387-d1a9-a8e99e9ur8ru8
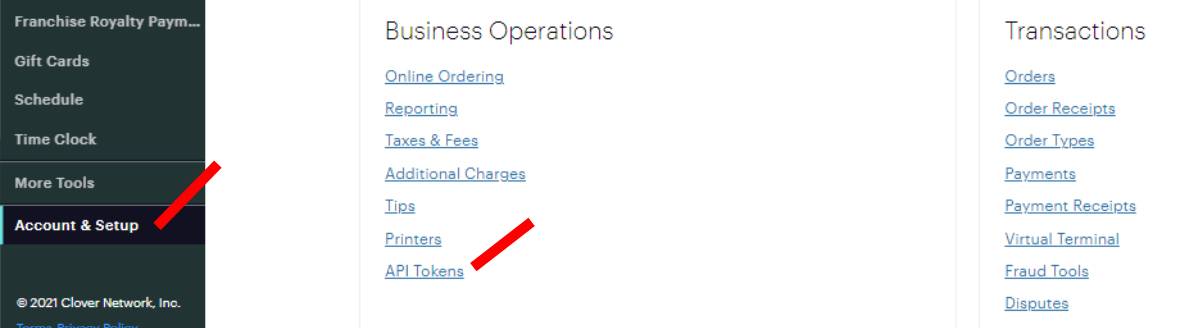
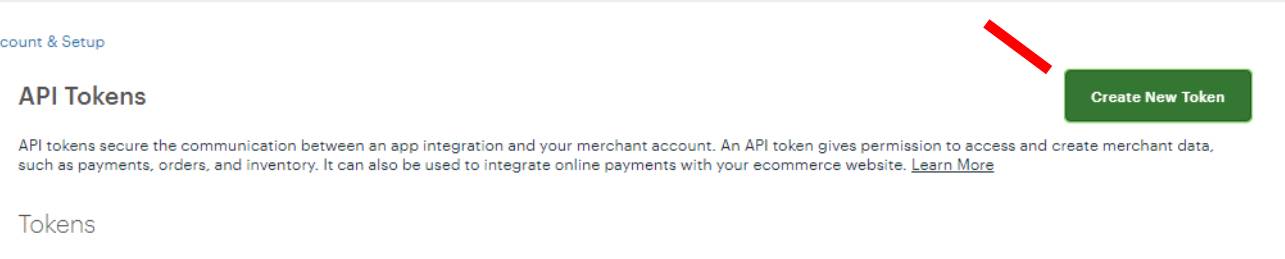
Login to clover.com portal and select Account & Setup link in the left menu then select API Tokens link under Business Operations section.
NOTE: You will be prompted to enable Two Factor Authentication to your account in order to use the API.

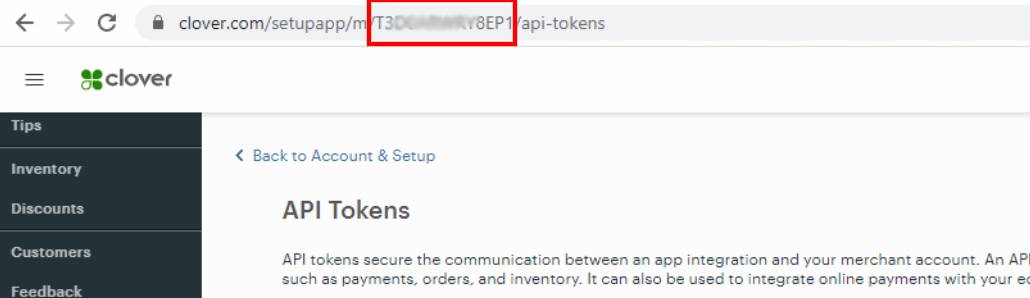
Once on the API Tokens page you can copy the Clover Merchant ID from the URL. To ensure we collect the full ID just have the client copy and paste full URL (red box shows actual merchant ID)
On the API Tokens page select Create New Token button
On the Create New Token pop-up name the token “PMB” then select all Read & Write permissions and select Create Token button at the bottom
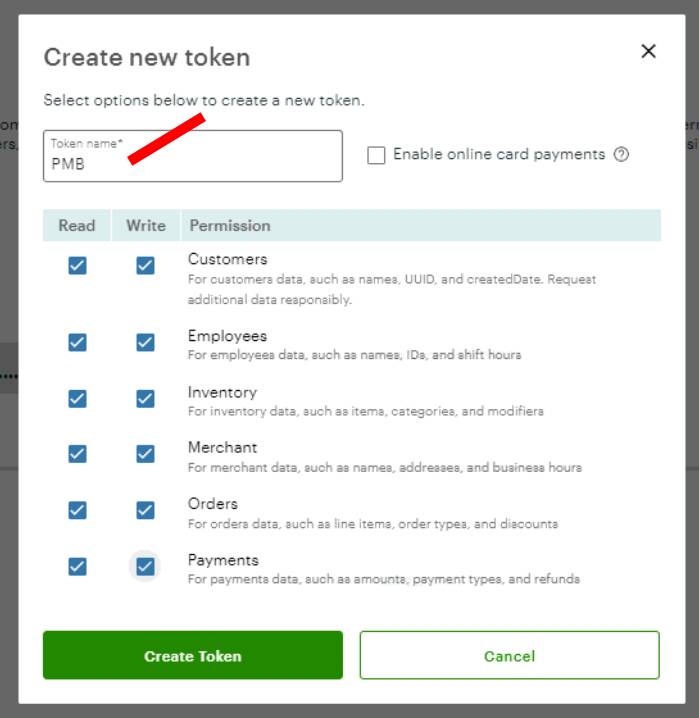
Once the new token is created you can select the view icon to display token and copy the API Token

Confirm Inventory Sync is running
After PMB Magic is successfully installed, wait about 10 minutes then you can confirm the product sync is working with one of the two methods below:
- If you have access to client’s Clover.com account use this method:
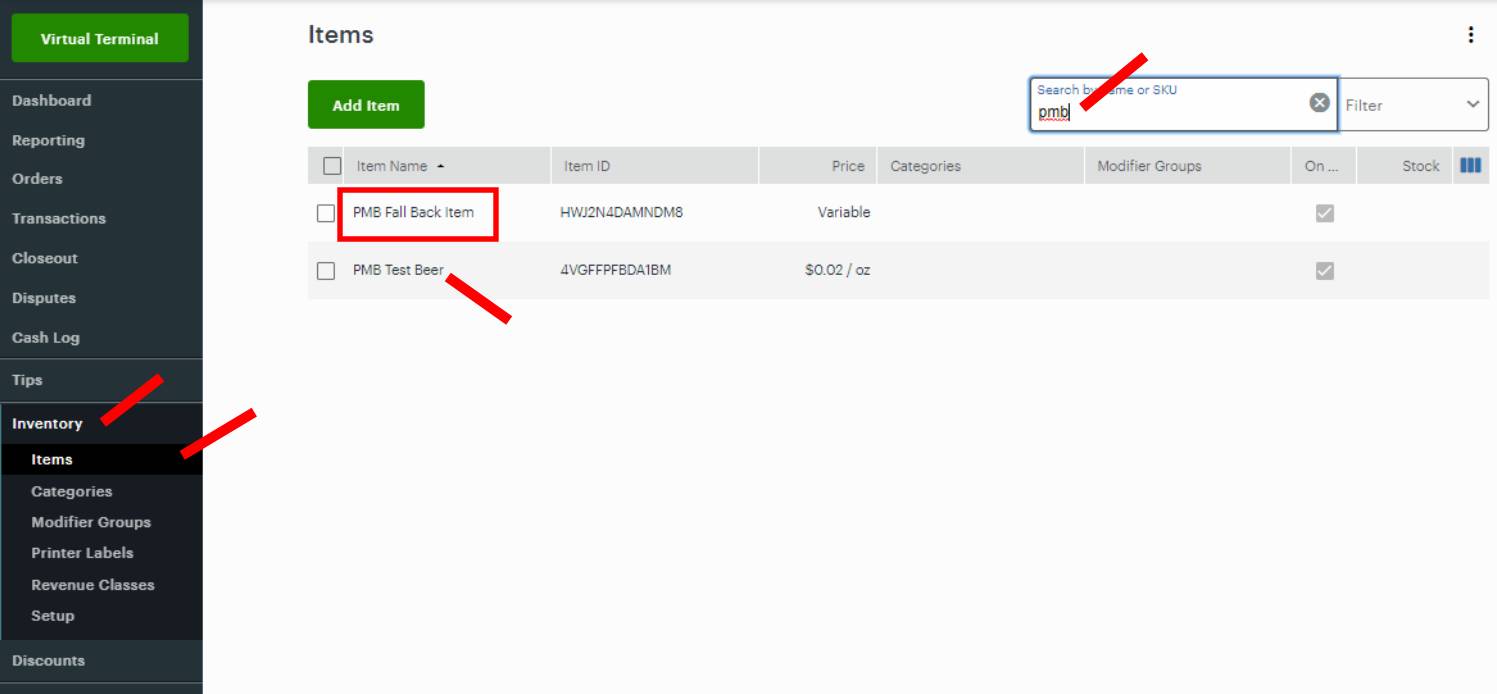
To do this, go to the Inventory link in the left menu then select the Item sub menu. On the Items page use the search box to search PMB and confirm you see the PMB Fall Back Item that is automatically added during the PMB Magic install.
To confirm the initial product sync worked search a few product names found in TTG to ensure they are displaying in Clover inventory.
To confirm new product sync is working try adding a new PMB Test Beer product in TTG then confirm it displays in Clover Inventory (may take up to 10 minutes to display in Clover)
- If do not have access to client’s Clover.com account use this method:
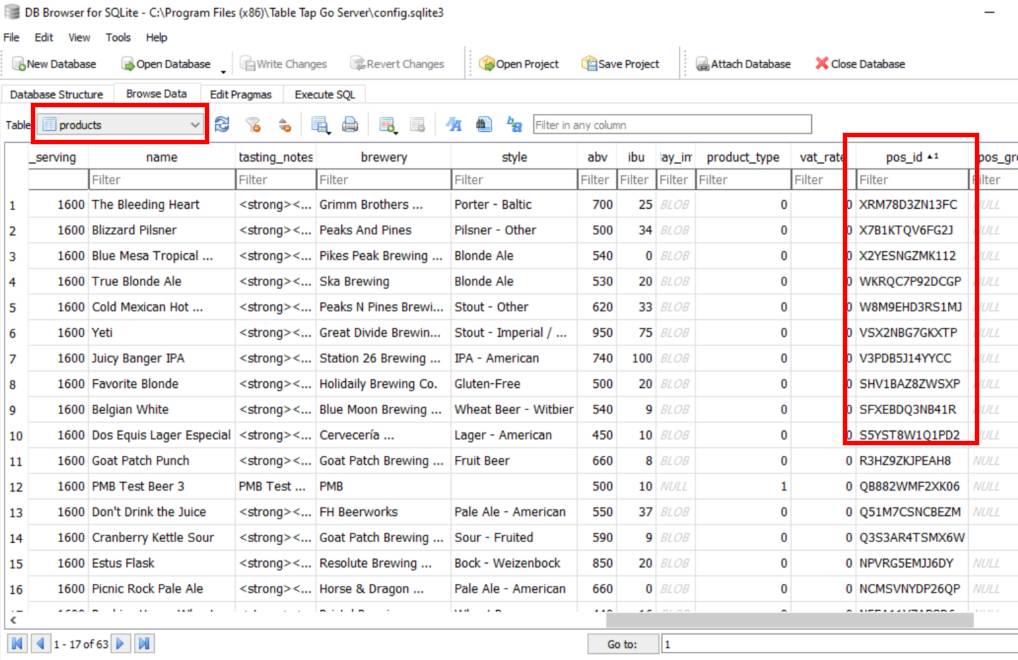
Install free DB BrowserSQLite on the PMB server. You will use this database tool to open the TTG product database located in C:\Program Files (x86)\Table Tap Go Server\config.sqlite3
Go to the Browse Data tab and select products from the Table drop down menu. Look for the pos_id column and confirm that the active products in TTG have a value in the pos_id field.
To confirm new product sync is working try adding a new PMB Test Beer product in TTG then find that product in the products database and confirm it has a value in the pos_id field (may take up to 10 minutes to display and be sure to refresh the DB browser)